Paper Pumpkin

Friday, April 2, 2021

Hydrangea Haven Bundle in Double Color

I recently saw a card sketch from another independent Stampin' Up! Demonstrator Connie Stewart. It used a square piece of designer series paper (DSP) that was cut in half on an angle. A single square of DSP will make TWO cards!! I immediately wanted to try this with one of my favorite DSPs from the January-June mini catalog, Hydrangea Hill. I grabbed my pack of paper, decided on a design (a difficult decision with so many gorgeous patterns to choose from), and cut myself several 4.25" squares. Then I simply cut the square in half on the diagonal and used one piece on the top of a card and the other piece on the bottom of a card. The cards shown below feature Purple Posy as a card base with Highland Heather and Gorgeous Grape for the hydrangeas. The leaves are Old Olive stamped on Basic White or Old Olive card stock. On the card with two hydrangeas I used Stampin' Blends to color basic pearls to match. The larger pearls are part of the Hydrangea Hill Suite. 


Once I had these cards made I decided to try the same design in another color! I grabbed Seaside Spray, Misty Moonlight, and Night of Navy. I really can't decided which set of cards I like better. Hydrangeas are beautiful in any color.


The sad part of these cards is the use of two 2019-2021 In-Colors: Purple Posy and Seaside Spray. These colors will be retired at the end of month. I will really miss Seaside Spray.

Thanks for reading my post. Which color card set is your favorite??? Let me know in the comments.

Friday, February 19, 2021

Garden Wishes Bundle

I love winter, but I am dreaming of spring and my garden. This is why my attention has turned to Stampin' Up!'s Dandy Garden Suite. The suite has not one, but TWO fabulous bundles as well as designer series paper (DSP), Memories & More card pack, Memories & More cards & envelopes, braided linen trim, and adorable ladybug trinkets. The two stamp sets featured are the Dragonfly Garden Bundle and the Garden Wishes Bundle. I have a Dragonfly Garden Bundle Class To Go based on cards designed by Nancy Thompson at Create with Nancy, who is a member of the same Gladheart Stampers Team that I am. The details for the class can be found by clicking here. Orders must be placed by February 28, 2021 which allows you take advantage of Sale-A-Bration as well. 

Today's card features the Garden Wishes bundle consisting of a stamp set and dies. The card I designed utilizes these dies which allow you to build dandelions without needing to stamp and color the images first. I had fun using the new blending brushes to create a background and to color my dandelions. This set also features a little bumblebee and a sweet swoosh showing his path. 


Card details:
  • Mossy Meadow card base 8.5" x 5.5" scored at 4.25"
  • Basic White Layer 4" x 5.25"
  • Mossy Meadow for die cutting images
  • Basic White for die cutting images
  • Cut the dandelion pieces in Basic White, use the blending brushes to add Bumblebee ink to the white pieces and Mossy Meadow along the stem
  • Layer the sections for the flowers on top of each other and adhere with liquid glue
  • Use blending brushes to add Mossy Meadow and Balmy Blue to the background
  • Stamp bumblebee image in Memento Black and color with Light Balmy Blue and Dark Daffodil Delight Stampin' Blends. Add Wink of Stella to the wings and die cut image.
  • Use Triple Banner Punch to dovetail the end of a 1" wide piece of Basic White. Stamp greeting in Mossy Meadow. Trim end even with card front.
  • Assemble card front using liquid glue to adhere the dandelions and leaves to the background. Some stems and leaves will need to be trimmed to fit. Adhere greeting to front using Stampin' Dimensionals. Adhere card front to the base with liquid glue. 
  • Stamp "swoosh" image in Memento Black. Adhere bumblebee to card front using Mini Stampin' Dimensionals.
  • Use a 4" x 5.25" piece of Basic White to layer on inside of card. Stamp individual dandelion from set on the inside if desired.

Assembling this card was enjoyable because the Blending Brushes were very easy to use and beautifully layer ink to the paper. The die cut leaves and grass have embossed areas showing detailed veins giving lots of texture to the card front. I'm looking forward to trying a few other color combinations for the flowers. The set is designed to be dandelions, but I think these dies would make pretty flowers in any combination. Here is one more card I have made with this stamp set and it shows a little peek of the Dandy Garden DSP as well. The dandelion on this card has been stamped in Memento Black ink, colored with watercolor pencils, and die cut to add to the front of the card. 


I enjoyed bringing you this quick look at the Garden Wishes Bundle. If you would like to see the Stampin' Up! products I used in making the featured card you can click on supply list below to see my business web page with links to all the products. 

Supply List


Happy Stamping!
Michelle


Friday, January 1, 2021

'Tis a Sweet New Year!

 Christmas is over and the New Year has been ushered in. What is left to look forward to??? In just a few days the January-June Mini Catalog product is available for purchase and Sale-A-Bration begins!!! This "Sweet" deal means for every $50 in product you can choose a free item from the Sale-A-Bration brochure. 

As I perused the January-June Mini Catalog I was tempted by the luscious Sweet Strawberry Bundle. I love strawberries and always eagerly await fresh strawberry season. I was able to get a wonderful head start on the season this year by making a couple of cards with this new bundle. I designed this first card for a virtual card swap I participated in. I decided to go with a slimline card as this style card is becoming popular again. I have seen several different sizes for these cards and this one is 9" x 3.75" and fits in a business envelope or you could make a custom envelope.

Sweet Strawberry Bundle Slimline Card

The bundle comes with a stamp set and a punch which lets you create fun dimension on a card. The card above showcases all of the punched items: strawberry, stem, leaf, and small flower. All of these items are in the same punch. What a great value!!! Here is a closer look at those sweet, sweet strawberries. They look good enough to eat. The strawberry outline is stamped with Cherry Cobbler and has a solid image stamp in Poppy Parade. I did add Wink of Stella to give them an extra sparkle. Stems and leaves are stamped with Garden Green and filled in with Granny Apple Green. Flowers are stamped with Smokey Slate.


I loved making this card so much I decided to make it in our standard 5.5" x 4.25" size as well. I believe the card works well in either format. Both cards have Granny Apple Green card base, Basic Black, and Balmy Blue for background. I stamped the leaf and flower image in Balmy Blue for the background and layered my punched strawberries, leaves, and flowers over the top. Rhinestone Basic Jewels were added for a little extra sparkle. 
Standard Size Card

I am looking forward to creating more cards with this bundle and using the coordinating Sale-A-Bration Designer Series Paper and stamp set which features more yummy summer fruit. Here is one last look at the cards side by side. Which style is your preference?


Friday, July 24, 2020

Have a Hoot for Halloween

It seems early to start thinking about holiday crafting, but Halloween and all the fall and winter holidays will be upon us before we know it. Today I'm bringing you a sneak peak of a stamp set that will be available in the new August-December Mini Catalog (formerly the Holiday catalog). The name of the set is Have a Hoot and it is all about cute little owls. One of the fun features of this set is it can be used for two holidays!! Halloween and Christmas. I am showing you a Halloween card today. Aren't these little owls the best? The stamp set comes as a die bundle which allows you to cut out the little owls and three tags of different sizes. The tag die cut was used to make the frame for the owls on the card.


The background images were stamped on Whisper White which had been sponged with Gorgeous Grape and Highland Heather inks. I sponged the ink and then used the Stamparatus to stamp the two images. Next I used Dark Suede Stampin' Blends to shade in the trees for the background. 


I stamped the owl images again on scrap pieces of Whisper White, colored them with Stampin' Blends and die cut the owls. I placed the colored and die cut images on the card with dimensionals to raise them up off the background.  The spider web was die cut in Basic Black and then Wink of Stella was used to give it a shiny appearance.


On the inside:

Supplies for this card will be available when the new catalog goes live on August 4, 2020. 

Thanks for checking out my card and I would love to hear from you in the comments below!!!!

Friday, July 10, 2020

Cute Fruit Slimline Cards

I have seen interest lately in what people are calling slimline cards. These cards are 8.5" x 3.5" and fit in a standard business envelope. I decided to try using the Cute Fruit stamp set to make a couple of cards in this slimline style. Cute Fruit is perfect for summer and is very adorable. The stamp set can be found in the Beginner Brochure, but not in the 2020-21 Annual Catalog.  

My first card features the watermelon and one of the faces which is included in the set. I'm sure this card would brighten anyone's day! I stamped 6 images in Flirty Flamingo and Granny Apple Green directly to a 3" x 8.5" piece of Whisper White. I stamped four more melon on scrap Whisper White and fussy cut the images. The two with faces were layered on Basic Black and I fussy cut around them again. 


Here's a closer look at the melon with faces and the greeting. The greeting uses the Stitched Shapes and Layering Circles dies. I think the faces are so very cute!!!


My second card features the pineapple and yet another adorable face!! The pineapple are stamped in Daffodil Delight and Granny Apple Green. I fussy cut these three pineapple as well. I used two more of the fruit shapes to create a background with Gorgeous Grape and Coastal Cabana. The Whisper White piece is 8.25" x 3.25" and layered onto a Gorgeous Grape card base. I used the Lovely Label Punch to include my greeting.


I think this stamp set is aptly named since these are indeed some "Cute Fruit"!! As I mentioned earlier, this stamp set is in the beginner brochure and can be purchased separately or as a group products which include clear block D, pack of Whisper White cardstock, and a Stampin' Spot assortment (Basic Gray, Coastal Cabana, Daffodil Delight, Flirty Flamingo, Gorgeous Grape, Granny Apple Green, Real Red, and Shaded Spruce). 

I would love to know what you think of these Cute Fruit cards in the comments below.


Supplies:
Cute Fruit Stamp Set

Cute Fruit Collection

Friday, July 3, 2020

Three Cards from One 6" x 6" Designer Series Paper

Today I have template for cutting a 6" x 6" piece of patterned paper. I designed this as I was having a play with the Boho Indigo Product Medley. I didn't want to waste any of the beautiful DSP (designer series paper) that comes with this medley. My template makes three cards and there is one tiny 1/2" x 1" scrap left over. 

6" x 6" Template

Start by cutting a 1" strip from one side of your patterned paper (Piece A on the template); rotate the paper 90° and cut a 2" strip (Piece C on the template). You now have a piece left that is 4" x 5", cut the 5" side so you have four strips that each measure 4" x 1.25" (Piece B on the template). 

Card #1 uses the B pieces which measure 1.25" x 4". In my card design I used both sides of the paper. I layered these pieces onto a 4" x 5.25" piece of coordinating cardstock. The B pieces on each end are mounted without a border and the two in the middle have about 1/8" between. This is the only place you will see the cardstock under the DSP.  I added some ribbon and then used dimensionals to layer to the front of a 4.25" x 5.5" card base.  

Card #1 - B pieces


Card #2 uses Piece C which measures 2" x 5". I placed this piece on a 4" x 5.25" piece of cardstock and layered to the front of a 4.25" x 5.5" card. In the Boho Indigo medley you receive some pieces of 6" x 6" paper that are already embossed which I used on this card. 

Card #2 - C piece


Card #3 uses piece A which is trimmed to 1" x 5.5" so it fits all the way across a 4.25" x 5.5" card front. I added a coordinating color behind the DSP strip and this piece measures 1.25" x 5.5". On this card I added a piece of the embossed DSP left over from Card #2 and stamped my saying directly on the front of a Very Vanilla card. I also stamped some leaves on the card front to add visual interest.

Card #3 - A piece


The cutting template can be used with just about any patterned paper you desire. I made three additional cards using the Ornate Garden DSP to allow you to see the template in a different color scheme. I hope you enjoyed these cards and the cutting pattern you can use with any pretty paper.

Card #1 - B pieces

Card #2 - C piece

Card #3 - A piece

Friday, June 26, 2020

Peony Garden Suite

Do you have a favorite flower? Maybe it is hard to pick just one or maybe you have never thought about it. I actually have a hard time choosing just one, but one of my favorites is the peony. I love their beautiful rounded blooms and fragrance. I was so excited when I saw the new Peony Garden Suite in the 2020-21 Stampin' Up!Ⓡ Annual Catalog. The suite consists of a stamp and die bundle along with gorgeous Designer Series Paper, shimmery ribbon, faceted gems, vellum doilies, and even an embossing folder. 

The two cards I am sharing today focus on the amazing large peony image in the stamp set as well as two of the greetings found in the set. I think the soft pinks and grays, which are featured in the suite, are perfect for sending a thoughtful greeting to a dear friend. I stamped this peony in Gray Granite and then colored the image with Petal Pink, Old Olive, and Mossy Meadow Stampin' Blends. The peony was die cut with the Peony Dies and the scallop edging on the white piece in the background is also cut with one of the dies in the set. The greeting uses the Lovely Labels Pick a Punch. Check out the Square Vellum Doily also peeking out from behind the peony!


Here is a closer image of the peony. The shading of the stamped image is a perfect guide to add color with the Stampin' Blends. I started with the light Petal Pink and added dark Petal Pink where the stamped image had shading. On the leaves I used Light Old Olive and Light Mossy Meadow. I did go back with a Mossy Meadow Stampin' Write Marker to add some definition to the veins in the leaves. 


My second card features the same stamped image without adding any color. It is stamped in Basic Gray and die cut. I used the beautiful Square Vellum Dollies in the background again and you can see the Elegant Faceted Gems better on this card as well the Dainty Diamonds embossing folder on the lighter gray strip. I think this makes a perfect sympathy card.


The Designer Series Paper in this suite is so soft and subtle and makes a great companion for the lovely peony image!
Peony Garden Designer Series Paper

Both of the cards I have shared today were inspired by card sketches I found on Pinterest. Card sketches give you a suggested layout without showing actual stamped images and allows you to be creative with a guideline rather than starting with a complete blank canvas. Card #1 with the Petal Pink peony was inspired by a sketch from Patsy Waggoner at Stamps To Die For. Card #2 with the Basic Gray peony was inspired by a sketch (card sketch #9) from Dawn Griffith at Dawn's Stamping Thoughts. Both of these ladies are also Independent Stampin' Up! Demonstrators.
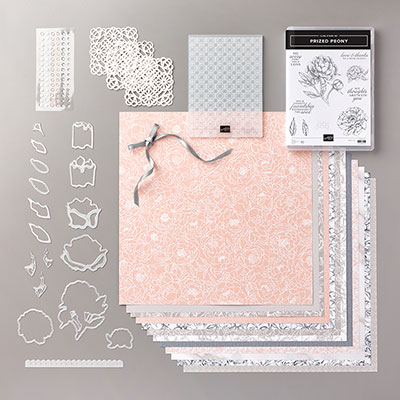
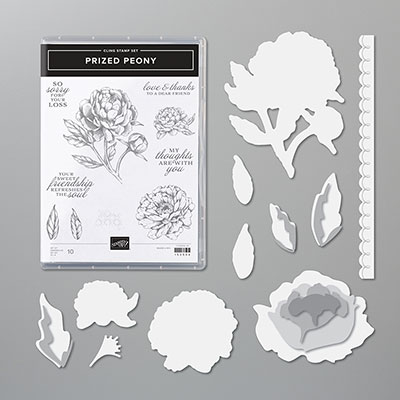
Any of these supplies can be purchased in my online store. Click the link to the right to shop!

PEONY GARDEN SUITE COLLECTION (ENGLISH)PRIZED PEONY BUNDLE (ENGLISH)SQUARE VELLUM DOILIESELEGANT FACETED GEMSDAINTY DIAMONDS 3D EMBOSSING FOLDERPETAL PINK STAMPIN' BLENDS COMBO PACKOLD OLIVE STAMPIN' BLENDS COMBO PACKcrafting markers moss green